
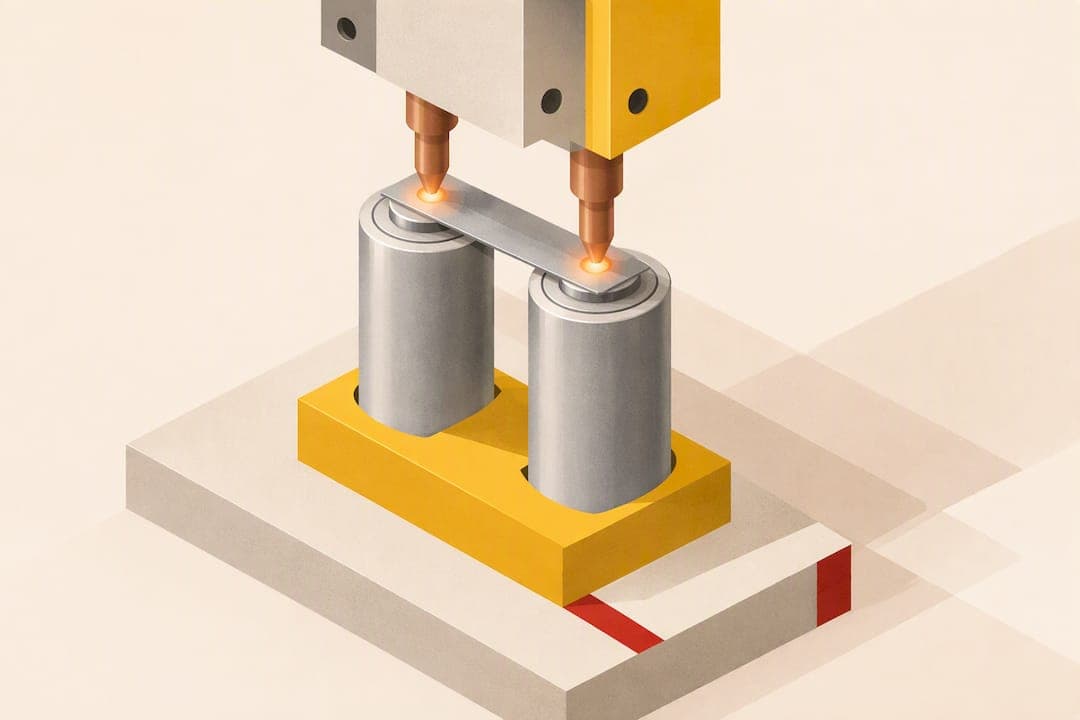
Yes, spot welding is a sound way to join battery cells for a DIY pack, but only when you use proper equipment, suitable materials, and disciplined technique. A purpose-built welder or a carefully upgraded DIY rig with heavy-gauge cabling and matched electrodes is the baseline, not an upgrade. Work in a clear, fire-safe area with basic PPE on, and check the equipment and safety sections below before you turn on a single cell.
TL;DR:
- For a DIY rig, upgrade heavy gauge cables and stabilize the electrode mount before increasing pulse energy, since contact problems often cause weak welds.
- Match strip thickness to pack current, and soak a scratched sample of suspect stock in salt water for 12 to 24 hours; plated steel corrodes.
- Keep the electrodes about 1.5 to 3 millimeters apart, apply roughly 300 to 500 grams of pressure, and test settings on scrap before welding cells.
- Isolate dented, swollen, or damaged cells, use a noncombustible work surface, and keep a fire extinguisher rated for lithium battery fires within reach.
- Before connecting the BMS, inspect welds for a bright, slightly indented joint, pull test each, and check resistance or continuity with a multimeter.
Table of Contents
- How battery spot welding actually works
- Buying a commercial welder vs building your own rig
- Choosing and prepping nickel strip for your pack
- Dialing in electrode placement, pressure and spacing
- Working safely with lithium-ion cells on the bench
- Verifying weld quality before you close up the pack
- Sourcing parts and components for your build
- A hobbyist's honest take on getting this right
- AkkuPlus: where to find cells, consumables and repair help
- FAQ
- Sources
How battery spot welding actually works
Spot welding sends a short, very high current pulse through the nickel strip and into the cell terminal. Resistance at that contact point generates intense, localized heat that fuses the strip to the metal without melting the cell itself. The pulse has to stay brief: a longer pulse pushes heat into the cell and risks damaging the internals, so timing control matters as much as current.
Electrode tip area and contact pressure set the current density at the joint. A smaller, firmer contact point concentrates current and produces a clean nugget; a loose or oxidized contact spreads current, wastes energy and leaves a weak bond. This is why pulse energy, duration and contact quality all have to line up together rather than relying on raw power alone.

Buying a commercial welder vs building your own rig
A commercial spot welder gives you calibrated pulse control, electrodes matched to the machine's output and internal cabling sized correctly for the current it delivers. That combination is what makes repeatable welds possible without guesswork.
DIY builds are common and workable, but they borrow power from sources never designed for this job: car batteries, microwave oven transformers (MOTs) or bank's of capacitors discharged through a trigger circuit. These can produce strong welds, though they demand more attention to cable gauge, electrode mounting and trigger reliability than a factory unit does.
Whichever route you take, these specs decide weld quality:
- Pulse energy and current output matched to your strip thickness and cell tab size.
- Adjustable pulse timing so you can dial in short, controlled bursts.
- Electrode tips sized and shaped for consistent, small-area contact.
- Heavy-gauge cables, since thin extension cables waste energy and burn nickel strips instead of welding them cleanly.
If you're upgrading an existing DIY rig, start with thicker cables and a stable electrode mount before you assume you need more pulse energy. Weak welds trace back to poor contact and resistance losses far more often than to insufficient power.
Choosing and prepping nickel strip for your pack
Not every strip sold as "nickel" is pure nickel. A lot of cheap stock is nickel-plated steel, which conducts and welds poorly compared to the real thing. A quick way to check: scratch the surface and soak the strip in salt water for 12 to 24 hours; plated steel shows clear corrosion where pure nickel resists it.
- Match strip thickness to your pack's expected current: thinner strip for low-drain packs, thicker strip for high-current applications, since thicker material needs more pulse energy to fuse properly.
- Clean the strip with isopropyl alcohol before welding to remove oils and residue that interfere with a clean contact.
- Cut, shape or perforate the strip ahead of time so you're not handling sharp edges or adjusting fit mid-weld.
Dialing in electrode placement, pressure and spacing
Hold electrodes vertically, at roughly 90 degrees to the strip, with consistent spacing between tips of about 1.5 to 3 millimeters. Spacing outside that range lets current wander along the wrong path, producing a weak or lopsided weld.

Pressure matters just as much as current. A contact force around 300 to 500 grams tends to give consistent nuggets, since too little pressure leaves gaps that arc and spatter, while too much pressure can deform the strip or cell terminal. A simple spring-loaded jig or fixed electrode holder makes that pressure repeatable instead of relying on hand feel every time.
A practical sequence looks like this:
- Position the cleaned strip over the terminal and align the electrode tips.
- Apply steady pressure before triggering the pulse, not after.
- Fire a short pulse, release, and inspect before moving to the next point.
- Check for a bright, slightly indented weld with no blackening or cratering.
Pro Tip: Run a few test welds on scrap strip and a dead cell first; it takes thirty seconds and saves you from reworking a pack you've already assembled.
Working safely with lithium-ion cells on the bench
Battery work deserves the same respect as any job involving stored energy and flammable chemistry. Set up on a noncombustible surface, remove rings and metal jewelry before you start, and keep a fire extinguisher rated for lithium battery fires within reach.
- Wear safety glasses and keep hands clear of the weld point during the pulse.
- Isolate any cell that's dented, swollen or has a damaged wrapper rather than welding it into a pack.
- Protect the positive terminal area carefully, since a short across cells here is the fastest way to trigger a thermal event.
- Keep loose metal tools and scrap strip off the bench while cells are connected.
German workplace safety guidance from DGUV Information 205-041 on fire protection when handling lithium-ion batteries recommends noncombustible work surfaces, supervised charging and prompt isolation of damaged cells, practices worth following even in a home workshop. Separate DGUV guidance on handling high-voltage storage systems stresses hazard classification and PPE, a reminder that the same caution applies once small cells are joined into a higher-voltage pack. When a cell's condition is uncertain, the safer move is to set it aside rather than weld it in.
Verifying weld quality before you close up the pack
A good weld looks bright and slightly indented, with no heavy blackening or visible cracking at the joint. Blackening usually signals an incomplete bond that can fail under vibration, while a clean, consistent nugget correlates with a mechanically sound joint.
- Perform a gentle pull test on each weld; a properly fused joint resists moderate tension without lifting.
- Measure resistance or continuity across every weld point with a multimeter; higher-than-expected resistance means the joint needs rework, not a pass.
- Keep the BMS disconnected while welding and only wire it in once every joint has passed inspection, then do a final voltage and continuity check before the first charge.
Sourcing parts and components for your build
Before you start welding, line up a short list: genuine nickel strip in the right thickness, spare electrode tips, basic PPE, a multimeter and either a proven welder or heavy-gauge cabling if you're building your own. Match strip thickness to your pack's actual current draw rather than over-specifying material your welder can't fuse cleanly.
- Browse single cells when you need replacement or matching cells for a build.
- Check pack components if you'd rather start from a partially assembled base.
- Look at repair and workshop services when a build needs professional help.
A hobbyist's honest take on getting this right
Good welds come from consistent setup, not speed. Practice on scrap cells and strip until your pressure and timing are repeatable, and when in doubt about pulse energy or strip thickness, choose the more conservative setting over the stronger one.
— Waldemar Pelich
AkkuPlus: where to find cells, consumables and repair help
We have parts and services that can help make this kind of build easier to finish well. Our single cell category covers individual cells for new packs or replacements, our pack and component range suits readers who want a head start on assembly, and our workshop and repair services include options from cell swaps to custom pack builds for those who prefer professional aid.
- Compare single-cell specs before you commit to a pack layout.
- Check pack components if a partial build suits your project better.
- Reach out through our workshop services page for repair or custom assembly help.
Browse our cell and battery categories to get the parts moving toward your next build.
FAQ
Is spot welding safer than soldering for battery packs?
Spot welding is generally considered safer for lithium-ion cells because it applies heat for a fraction of a second at the contact point rather than prolonged heat from a soldering iron. Short, controlled pulses reduce the risk of overheating the cell, which is a documented concern with sustained soldering heat.
What pressure and electrode gap should I use for spot welding?
A contact pressure of roughly 300 to 500 grams and an electrode gap of about 1.5 to 3 millimeters are commonly recommended starting points. Adjust slightly based on your strip thickness and welder output, then confirm with a pull test.
How do I know if my nickel strip is real nickel or plated steel?
Scratch the surface and soak the strip in salt water for 12 to 24 hours; plated steel develops visible corrosion where pure nickel resists it. Running this test before a build avoids weak, high-resistance welds later.
How should I store or handle damaged lithium-ion cells?
Damaged, dented or swollen cells should be isolated immediately and kept off a work surface meant for welding or charging. DGUV safety guidance recommends noncombustible storage surfaces and treating any suspect cell as a hazard rather than incorporating it into a pack.
Can AkkuPlus help if I don't want to weld a pack myself?
Our workshop and repair services include custom pack assembly and cell replacement for those who prefer professional help over a DIY build. You can also browse our single-cell range if you only need matched replacement cells.
Sources
- How to Spot Weld Batteries: Tips and Safety Guide - Electronic Circuits Projects
- DGUV Information 205-041 „Brandschutz beim Umgang mit Lithium-Ionen-Batterien“
Recommended
- Long WP2.2‑12 – 12V 2.2Ah AGM Lead Battery (VdS, F1)
- Multipower - MP8-12C - 12 Volt 8Ah Pb - AGM Lead Battery, Cycle Resistant
- 20x Nickel-Steel Cell Spot Welding Connectors - 0.12 x 6 x 25mm
- Multipower - MP12-12 - 12 Volt 12Ah Pb - AGM Lead Battery (VdS)
This article was created with the assistance of Artificial Intelligence (AI) and has been reviewed by our editorial team. Despite careful preparation, we assume no liability for the completeness, accuracy, or timeliness of the information provided. The technical data and specifications supplied by the respective manufacturer shall always prevail.